Thursday 29 December 2011

Butterscotch Oat Thins - Mom

These never fail to garner compliments that far exceed the effort required to make them.  Honestly, you can't imagine, you just have to make them and start sharing.  From the UCW cook book, contributed by Corky Sawyer, who just might be one of the cleverest home bakers in the world, really just bake these, you'll thank me. 
Butterscotch Oat Thins
 
Pre-heat the oven to 300^F (150^C)
 
In a 13inch by 9inch ungreased and unlined square pan mix together
2 cups rolled oats
1 cup packed brown sugar
1 tsp baking powder
1/2 tsp salt
 
Pour over
1/2 cup melted butter
1/2 tsp vanilla
 
Mix thoroughly then spread it out into an even layer and press down firmly with the back of a spoon.
 
Bake for 20 minutes.
  
Take out of the oven and sprinkle generously with chocolate chips and leave them to melt.  Spread the chocolate chips to form a smooth top.
  
At this point your mouth should be watering but I must advise patience.  If you try to cut them right now, they will crumble, you'll have a pile of, admittedly yummy, rubble with melted chocolate acting like slimy glue.  Leave them to cool right down until the bottom of the pan is no longer warm.
  
Then cut them into squares or rectangles, or as I've decided recently long fingers.
 
They really are too yummy to share but you probably don't want to have to run a marathon to burn off this many calories so offer them round, the ratio of accolade to effort is ridiculously disproportionate.

Monday 26 December 2011

a few desserts

Being busy socializing this holiday season means that most of my baking has deviated from the blog agenda, but I don't like the idea of not posting just because I'm not doing family recipes.  And I'm a bit proud of my efforts so I might as well show off.

First up, my croquembouch! Making the profiteroles was super easy, as was making the orange blossom flavoured pastry creme to fill them. The spun sugar/caramel was a bit more difficult, I had to have a few tries to make it without burning it. My downfall, I think, was in over-filling the profiteroles because they were very heavy and as I built the tower up higher, it started falling in on itself, I don't have a croquembouch cone so I was free-forming the tower which might have been my other downfall. Never the less, I was well pleased with myself. Delia Smith's choux pastry recipe (x4) and a basic pastry creme recipe (x4) with orange zest and orange blossom water added instead of vanilla (I read about 5 pastry creme recipes and can't remember which one I used).  I decorated it with spun sugar and hand piped chocolate stars.

Second is my baked chocolate and orange mousse.  James Martin rarely sends me wrong, I added a shortbread base as I was afraid of it sticking to the bottom or not being able to serve it neatly and decorated with candied orange slices.  Much as I love James' love for desserts, I think he doesn't realize that most people don't need as big a serving has he indicates, the full recipe stated serves 4, I also only made a half recipe of mousse and it easily made 6 generous slices.

Lastly is my Christmas dinner dessert, Chocolate and Chestnut souffle Mont Bry, based on a Larousse Gastronomique recipe (I added a bit of cocoa powder to make it chocolaty).  I don't have a souffle dish, nor do I have 6 ramekins, so I used 4 mugs, there wasn't enough mixture to fill them right to the top as per instructions (I guess my mugs were a too big) so they didn't rise much over the top of the mug and the slanted sides of the mug probably added to the result of the souffles capsizing a bit, but not bad for a first attempt.

Sorry, I haven't written out the recipes, but I have referenced what I can remember so you can so you can go track them down if you're interested.

Sunday 11 December 2011

Pillow Cookies

This post is for my niece Kayla who seemed to think it was the neatest thing to have a brownie inside a cookie. Kayla and I spent some time at my parent's together a few summers ago, it was really nice to have some one on one time with her, and in keeping with family tradition we did some baking together.  I kind of like the idea of the new generation making memories in the kitchen and it was fun to be a part of it with her.  When Kayla talks about these (and I'm so pleased she remembers them and mentions them on occasion) she calls them Pillows Cookies, and it does look like the cookie version of a blanket of dough pulled up over a pillow of brownie, and more than one cookie I suppose means more than one pillow, so I guess she is correct in her naming of them.
  
This is more about technique than a given recipe, but we made chocolate chip cookies over chocolate brownies.  One thing you have to be careful about, if your brownie is too rich and squishy it won't stay firm and look like a pillow it will sink in the second baking and form a thin layer inside the cookie instead of forming the 'pillow', if it is too cake like it'll dry out in the second baking. 
 
See my previous post for the cookie dough recipe.  I halved the following recipe and it still made more brownie than I needed for the cookies.
 
Chocolate Brownies
 
Pre-heat your oven to 350^F (177^C)
 
Cream together
1/2 cup butter
2 squares of melted unsweetened baking chocolate
       (baking chocolate is 1 U.S. oz per square so that's approx 28 grams per square)
1 cup sugar
 
Then add in and mix well
2 eggs
 
Finally stir in
1/2 cup flour
1/2 cup chocolate chips (this was Kayla's idea, and a good one it was)
 
Spread into a greased and flour dusted 8 inch square pan and bake for 25 - 30 minutes.
 
Let it cool in the pan for a few minutes and it will pull away from the sides, then you can turn it out onto a wire rack and let it cool down completely.  Then trim the sides and cut it into 1 inch to 1 1/2 inch squares.  I love the fragile, crackly top of a good brownie.

 
Scoop up about 2 tbsp of cookie dough and form into a ball, then press the brownie down into the ball until the top is flush with the dough.
 
Then take another table spoon of dough and spread it over the top of the brownie, make sure the brownie is sealed tight inside the ball of cookie dough and put it on a baking sheet.  Place the cookies a good 5 inches apart because these spread out big time.  Once you have a sheet full of cookies put it in the fridge for 10 - 15 minutes, if your dough is stiff enough you don't have to do this but if not, the cookie could spread too fast and you don't get the blanket over the pillow, you end up with an exposed brownie on top of a cookie.
 
Bake for 7 - 10 minutes, same as a normal chocolate chip cookie, remember the brownie inside is already cooked so doesn't actually need to be baked again.
 
They are monstrously huge with a distinctive bump of the brownie pillow in the middle.  You can see how big they really are when they're side by side with some regular chocolate chip cookies on the right.  But if you've read this far, what you're probably interested in seeing is the inside, check it out!
 
You’re limited only by your own imagination, chocolate brownie in a blanket of chocolate chip cookie is heaven but imagine peanut butter cookie or vanilla cookie, how about a white chocolate ‘blondie’in a blanket of double chocolate cookie, take your two favourite combinations and start merging and if you come up with an amazing combination, let me know!

Chocolate Chip Cookies - Mom

Ahhh, chocolate chip cookies, the gold standard of childhood home baking memories, I think this was the most often baked recipe in our home. So with credit to the back of the packet of chocolate chips, I present our family version of the Hershey's Chocolate Town Chip cookie. There isn’t much variation on the recipe, the only difference is we used ground walnuts instead of chopped so you didn’t bite into a crunchy piece of walnut, it made the dough a little stiffer and sometimes the cookies stayed in little humps while baking instead of spreading out into flat discs, but they still tasted good.
Making them smells like home.
Chocolate Chip Cookies
 
Pre-heat your oven to 375^F (190^F)
 
Cream together until smooth and pale and you can no longer feel any grains
1 cup shortening or 3/4 cup butter or margarine
1 cup brown sugar
1/2 cup sugar
 
Then add to the mixer
1 tsp vanilla
2 eggs
beat until fluffy
 
Mix in
2 cups unsifted all-purpose flour
1 tsp baking soda
1 tsp salt
 
At this point your mixer is probably ready to give up so by hand mix in
1 cup ground walnuts
     (I couldn't find ground walnuts so I used pieces that I bashed into a paste with my rolling pin)
2 cups semi-sweet chocolate chips (they don't have to be Hershey, we almost always had bulk buy chips)
 
Drop by teaspoon full onto a cookie sheet and bake for 7 - 10 minutes, I like them really toasty brown so I went the full 10 min.

I don't know why, but most of the chocolate chips sank to the bottom of the cookies when baking this time, they were still there in every bite so no matter.

Brioche

I bit of a departure from the family baking, and sorry I'm not up to sharing this recipe it's from The Cook's Guide to Bread if you want to find it, although I warn you these could kill you.  I'm simultaneously proud of my creations and appalled by the amount of butter used in this bread recipe, I used to love a piece of brioche toasted with butter, now I think eating that is like saying this lard isn't fatty enough, I think I'll add some bacon grease.  Even the egg wash was egg yolk only so they came out super shiny and although dark.

But I do kind want to show off my results so please forgive me for expecting you to indulge me.


I had a bit of a revelation, my lovely antique tart tins might actually be brioche roll tins.  I now need to go find someone to give these to immediately so I don't eat them.

Monday 5 December 2011

Butter Tarts - Mom

I felt a bit bad teasing my Dad last week, I have Mom’s recipe book with the butter tarts recipe in it. Which means that she can’t make them because she doesn’t have the recipe anymore. So I thought I’d kill two birds with one stone, have another try at making pastry and get the butter tarts up on the blog so at least Mom has access to the recipe should she decide to take pity on Dad and make him some.  I secretly think he would be happy enough with the lead up to Christmas if it was all about butter tarts, no tree, no decorations, no presents and definitely no snow, just a pile of butter tarts.
I explain butter tarts to my British friends as ‘what you should be eating at Christmas instead of mince pies.’ I hate mince pies, they’re a very evil thing to offer someone who is expecting a sweet treat, and when I offer butter tarts I get a lot of agreement on my stance. It is a personal mission to convert Britain to butter tarts instead of mince pies, that and pronouncing tomato as toe-may-toe, not toh-maa-toh, but the butter tarts are more important and I think I'm losing the toh-maa-toh war.
As for my latest pastry attempt, after intensive consultation with the pastry master (thanks Gram!) and some video searching online for technique, my results have improved greatly. I used Gram’s proportions of 3 cups of flour to 1 cup of fat, cut it in coarsely rather than fine, and add the liquid in 1 spoonful at a time. The pastry was very dry and very stiff, I probably could have used a bit more fat to make it softer, but it was flakier, I think, due to the coarser cutting and fully cooked on the bottom and best of all, didn’t shrink! The tart cases went into the oven the same height as the tin and came out the same height too, I couldn’t believe it! I might start working up the courage to make a pie with a pastry lid, I'll share my pastry recipe when I can get that to work.
Butter Tarts
Pre-heat an oven to 450^F (232^C)
Roll our and line a 12 hole muffin tin with short crust pastry
Mix together either with a hand mixer or a whisk:
1 egg
1/3 cup butter - room temperature soft
1 cup brown sugar
2 tbsp milk
1 tsp vanilla
Stir in
1/2 cup raisins
Fill the pastry 2/3 full make sure you try to get some raisins in each one!

Bake for 10 minutes, then turn the oven down to 350^F (117^C) and bake for another 10 - 15 minutes

Christmas Pastry Perfection.

***Update:  My Mom made some butter tarts for my Dad and sent me a few pictures.

Compare her tarts below to mine above.  Mom got a better baked sugar crust on the top of hers.

Here's my happy pappy with his butter tarts!

Saturday 26 November 2011

Thimble Cookies or Jam Thumbs or Bird's Nest Cookies - Mom

These little cookies never had a definite name when we were growing up, but despite that, we always knew what someone was talking about when they were named.  I always thought there was a special secret to these cookies, I think I thought that they formed little dents in the middle naturally, all on their own, like magic.  It wasn't some big revelation when I realized that you had to make the dent with your thumb before baking it was just common sense, but I was surprised to find out that Mom used a thimble to re-define the dent after baking because they often came out of the oven swollen almost shut.  Good advice Mom!

Jam Thumbs

Pre-heat the oven to 350^F (175^C)

Cream together until fluffy
1/2 cup butter
1/4 cup sugar

Mix in
1 egg yolk (save the white for later)
1 tsp vanilla

Finally stir in
1 cup flour

Shape the dough into balls, dip the balls in the egg white then roll in sweetened dessicated coconut and place on a cookie sheet.  Make a dent in the middle of the ball with your thumb before baking.

Bake for 10 - 12 minutes then take out of the oven and use a thimble (or in my case a slim bottle with a very small lid) and widen the dent to make it bigger before transferring to a wire rack to cool, work quickly to fill with raspberry jam while they're still warm.

Thursday 17 November 2011

Pumpkin Pie - Mom

This October, I missed Thanksgiving because I was on holiday.  I missed it last year due to excessive bad health.  Missing it once I could deal with, missing it two years in a row was unacceptable, so I rallied my fellow Canadian ex-pat friends and told them they were coming to my belated thanksgiving lunch.  Being Canadian I have to explain Thanksgiving to my British co-workers and in the process I get to tell them about Pumpkin Pie.  In my industry, people change companies a lot, so I have to explain it at least every other year, the reaction is always the same, deep suspicion about why you would put pumpkin in a pie, interrogation about the flavouring (is it sweet or savoury), and when I bring in my leftover pie to share round an almost universal chorus of how do you make that, I need the recipe.

So here it is, this is my Mom's pumpkin pie and I've given an increased quantity for the spices because she always adds extra and so do I.  If you can't find a tin of pumpkin puree (or don't want to go to a specialty food store and spend in the region of £6.00 on it), you can buy a pumpkin, the kind for a jack-o-lantern, scoop the seeds out and bake it until soft, then puree the flesh in a blender, it speaks of dedication to your pie, and you'll have more pumpkin than you need so you can also make soup.

This pie is what makes the house smell of Thanksgiving.

Pumpkin Pie

Pre-heat the oven to 450^F (232^C) and put the oven shelf at the lowest position.

Roll out short crust pastry and line two 7 - 8 inch pie plates, make a crimp with your fingers or press with a fork round the edge to make it pretty.  Use pastry that is made with vegetable shortening (or even lard if you can) do not use all butter pastry, because of the high oven temperature, all butter pastry is likely to burn.  Do not dock the pastry, leave it unblemished because you are not blind baking it first.

Mix the ingredients with an electric mixer in order, beating well between every ingredient
2 eggs
3/4 cup sugar
1 3/4 cup pumpkin puree (that's a whole small can if you bought it)
Spices:  2 tsp dried ginger
            2 tsp cinnamon
            1/2 tsp cloves
1 can evaporated milk (that's a 410g can)

Pour the filling into the unbaked pie shells and put in the oven to bake for 15 minutes at 450^F, then turn the oven down to 350^F (177^C) and bake for another 30 - 45 minutes or until a knife inserted in the centre comes out clean.  If you have to put the two pie pans into the oven on a diagonal, about 10 minutes after turning down the temperature, swap the pies so the back one comes forward and the front one goes back, it'll help even out the cooking.

I didn't get a chance to take a picture of my pies before my thanksgiving lunch, I only thought of taking a photo after I had taken it to work and put it by the tea kettle for people to help themselves, it was gone by the time I remembered, sorry.  So here's a picture of the lovely flowers I was given for making thanksgiving lunch, aren't they pretty.

Wednesday 16 November 2011

Pinwheel Cookies

I’ve gotten ahead on the baking and behind on the blogging, the result is, hopefully, two posts this week.

My mom had a rather meagre selection of cook books when I was young, and even fewer on baking, but I can still remember looking through them and thinking the few pictures were amazing and inspiring. Looking back now those same photos look horribly dated and, worse, very pedestrian, but they served their purpose at the time and got me to experiment with new recipes all the same.
 
One of the favourite experiments were the pinwheel cookies, as my sister Heather said, “They weren’t made very often but when they were made they were good.” Well, they weren't made very often because I was the only one who made them, and I did share baking duties with my sisters and mom.  The pinwheels sparked my love of icebox cookies as the ultimate in convenience baking and the swirls of vanilla and chocolate cookie dough always raised the question of how do you make that? Which made me feel very smart because I was the one who could do it. My mom recently claimed on one of her visits that she used to make the pinwheel cookies as well, but when she watched me make them for the blog (and to send some to Allana and Dad), she then backed down from her claim saying she doesn’t remember ever having to roll out and sandwich together two flavours of dough, I’ll let her off the hook for trying to steal my thunder because she backed down so readily.
 
Pinwheel Cookies
 
Mix together until smooth
2/3 cup butter
1 cup brown sugar
 
then add and mix well
1 egg
1 tsp vanilla extract
 
In a separate bowl, mix together
2 cups flour
1/4 tsp salt
1/2 tsp baking soda
then stir into the batter until smooth.
 
To make the pinwheels, divide the dough in half, put half onto a sheet of baking paper and leave the other half in the mixing bowl.
 
Add to the dough in the bowl
2 tbsp cocoa powder (make sure it's dark cocoa powder)
and mix until the dough is chocolate
 
Roll out the chocolate and vanilla doughs on separate sheets of baking paper to 1/8 inch thick and to the same length, but make the chocolate one a bit narrower.  A trick I have for making them very rectangular when they start to go oval is to cut off the rounded ends of the oval, then cut those pieces in half, turn the two halves so that the corners are to the outside and patch them back onto the main piece of dough.  The dough is really forgiving and you're going to roll everything up into a log so no one will see any of the patchwork.  If they're not rectangular you get quite a few 'dud' cookies when you start cutting the ends.

Then sandwich together, chocolate on top of vanilla, try to get the chocolate in the middle of the vanilla so there is a border on both sides.  You want a border on both sides so the centre of the pinwheel has a nice tight curl in the middle and so the vanilla seals the chocolate on the outside of the roll.  I didn't do a very good job, it's been a while since I made these and it requires more conviction than I had to flip the chocolate over.

Then roll into a log, wrap with one of the sheets of paper and freeze for at least an hour.  At this point you can take the dough out of the freezer to slice and bake or divide into portions to freeze to use later (it'll keep in the freezer for 1 - 3 months depending on how cold your freezer is).
Preheat the oven to 350^F (around 175^C), slice the log into 1/4 inch cookies, the size of the cookie is not based on the thickness of the slice but the fatness of the log, don't be tempted to cut them thicker to make them bigger, it won't work.  Bake for 6 - 10 minutes, oven temperatures vary as well as the coldness of the dough, as the dough warms up by sitting on the kitchen counter while waiting for successive trays to bake they will need less time.

You can see what I mean about not getting a tight curl in the middle, I didn't have enough border of vanilla on the inside edge of the roll.  They were still delicious.

Sunday 6 November 2011

Scottish Scones or Highland Griddle Scones

The only meal that is a mandatory requirement when I see my Mom, whether I visit her or she visits me, is the Scone Lunch.  This is a meal that has been passed down the generations in our family in my memories from my Grandma Ross, although I know she learned how to make scones from her mother and can only guess how many generations before.  Scottish scones are my first baking memory, standing on a step-stool in Grandma's kitchen in the house on Mallard St, watching her papery skinned wrinkled fingers softly working the dough, turning them into scones on her aluminum electric griddle.  Making scones with her was an apprenticeship, I learned components of the process in stages, a bit at a time, how to cut the dough, to turn the scones so they cook on all sides, how to rub the butter into the flour, and my favourite bit (even still today) flipping the dough in your hands to knock the excess flour off.  I don't think she ever let me make a full batch on my own so in a way I never graduated.  In my defense, she didn't leave very good instructions for my continuing education behind, the only copy we have of her recipe is in a very tattered old copy of a United Church Women's cook book, most of the ladies at church would have been invited round for a scone lunch and they must have pestered her into including the recipe, I almost wonder if she didn't want to share the recipe because if you hadn't ever made them you would read this and not even try.

This is the hardest baking I have ever done, in preparation for this blog entry I made 5 batches in the space of about a month, under the guidance of my Mom and picking her brains for every tip and trick that she can remember from her Mom.  If you are at all interested in making these, please take heart that I still feel nerves about them turning out wrong when I'm making them.  I really don't know how to write this any better than she did, I'll try to make it fit my recipe writing style but I don't promise anything easy.

Grandma Chrissie Ross' Scones

In a mixing bowl, add
Flour, a 2 cup measuring cup filled until it is heaped up, a really big round heap of flour
1/4 tsp salt
1 tsp baking soda, generously rounded not flat
1 tsp cream of tartar, again generously rounded not flat
mix well and leave to rest for half an hour at least - don't skip this I don't know why it's necessary but there is magic in the wait

After resting the flour rub into the flour mix
Butter the size of a large walnut - go buy some walnuts in their shells if you can't gauge

At this point pre-heat an electric griddle to around 345^F, or make a wild guess with a frying pan on the stove top, I have settings 1-6 on my stove and need a heat setting between 3 and 4, they don't brown at 3 and they brown too fast at 4, I adjust back and forth.  Use a nice big pan with a flat bottom, if you can find a square pan all the better, do not add grease or cooking spray to the pan, heat it DRY, the flour on the scones will stop them from sticking I promise, but you can use a non-stick pan if you are skeptical.

Make a well in the centre and add
1 egg
2 tablespoons of golden syrup or pancake syrup (or for a short while we used honey from Mom's bees)
1 to 1 1/4 cups of milk - use half evaporated milk and half water (start with 1 cup and add the rest only if needed), the evaporated milk makes the insides yellow and much richer than plain milk
Mix to make a soft dough, do not over mix but there cannot be any lumps of flour and it should be stiff enough to be handled with just your fingers and a knife, no spatulas or flippers or rolling pins allowed.  Turn out a third of the dough onto a well floured counter cover the top with more flour and pat the dough out to a round.

Be sure to push the flour up from the board onto the edges of the round as you pat it in case you need to cook the edges.
Cut into 6 triangles, make a little ridge line of flour with your knife before cutting through and push the flour down into the cut, wiggle the knife side to side a bit as you go.

Use your knife to pick up each triangle, then flip it back and forth between your hands to knock the excess flour off before putting it on the griddle.

Cook for approximately 4 minutes on the first side then 3 minutes on the other side until pale golden brown.  You only get one flip but you can peek at the underside to see if it's ready to turn.  If the edges look a bit raw but the scone is browned, you can flip it up on the cut edge and turn it to cook on all the edges, the heat will go up through the scone in the insides will come out fluffy and pretty.

Once cooked cool them on a wire rack, then take a stiff bristle brush and brush off the rest of the flour before serving.  It makes enough for 4 greedy people to have scones for lunch/dessert or 6 polite people who are getting something else for dessert, I'll explain a bit later.

Be careful not to over cook the scones, my Grandpa Sidney was pretty sensitive to the level of brown that a scone reached and had a rather unkind phrase for one that was too brown.  He called them 'telephone scones' because he assumed that Grandma was chatting away on the phone when she should have been watching the scones.  There's a good one on the left and a telephone scone on the right.

The beauty of a Scottish Scone is that it starts as lunch and becomes dessert.  Our family's scone lunch must have canned salmon (British Columbia sockeye if you can find it) mixed up into a spread, butter, cheese and raspberry and other jams, additional nice things are salad vegetables in the summer to make your savoury sandwiches more interesting and soup in the winter because it's warm, lastly my Dad is fond of peanut butter on his dessert scones (although he was initially viewed as a heathen by his in laws for this request).  Start with the savouries and move on to the jams when you're nearly full.

A final word of warning, these scones go stale fast, they are soft and slightly moist and fluffy the day they are baked, they go dry and crumbly and mealy overnight.  Do not under any circumstances make them a day in advance, either be piggy enough to eat them all on the day they are baked or throw them away. 

They will take patience and practice, in my case a lifetime of trying and I'm still not quite there yet, but I'm getting closer and I now have the courage to invite friends round for a scone lunch and even to tell them that they're getting scones for lunch before they come.

Mmmmm, fish on a scone, it makes it all worth it.

Thursday 27 October 2011

Lemon Curd for Lemon Tarts - Gram LuVerne

My Gram LuVerne is the pastry master.  Not only does she make incredibly tender and flaky pastry but she also makes pie fillings to die for.  When my Dad feels like he hasn't had a dessert lately he starts asking for a pie, given what his mom produced I'm not surprised that this is his number one choice is pie.  Gram has modernized her lemon curd recipe and makes it in the microwave, but you could use a double boiler if you wanted to go old school.

I have plans to visit Gram and get a pastry making class from her because my pastry skills are akward and inept at best.  I won't be giving a pastry recipe here because I need some better instruction myself on how to make pastry before I start advising others, use your favourite short crust pastry or buy some ready made pastry or buy pre-baked pie/tart shells.

Line your tart cases with pastry and prick it all over with a fork to make lots and lots of holes, according to my Mom if you put enough holes in it you don't have to blind bake.  Bake it in a pre-heated oven at 400^F (205^C) for 8 - 10 minutes, until the edges are golden.  I want to take a minute to show off my tart cases, I bought them in an antique shop and they make impressively tall and very pretty tarts, although it is a labour of love to fold the pastry into all the little fluted edges.


Lemon Curd

In a microwave safe bowl (an ideal container is a very large pyrex measuring cup) whisk together
3/4 cup Granulated Sugar
3 Eggs
until fluffy, use an electric hand mixer, it will save your arm from falling off

Then mix in
1 tbsp grated Lemon Rind (zest)
1/2 cup Fresh Lemon Juice (2 - 4 lemons depending on their size)
2 tbsp soft butter
Microwave on high for 2 - 3 minutes depending on the wattage of your microwave (mine is wimpy).

Take it out and whisk it until smooth again.

Microwave on high again for 2 - 4 minutes or longer until it boils.

Whisk again until smooth, a really good whisking this time, then let it cool and thicken a bit in the bowl.

Once cool, pour it into your pie/tart shell(s), this will fill 9 of my very tall tarts, probably 12 regular tarts or a small pie.

If you want to make it a meringue pie, whisk together 2 - 3 egg whites, with 2 - 3 tbsp sugar and 1/4 tsp cream of tartar until it resembles fluffy clouds, dollop it onto your pie and brown the top in a very hot oven.  Gram's lazy meringue topping is to cover the tops with marshmallows and toast them in the oven - sorry Gram, giving away all your secrets!


It is a lusciously perfect balance between zingy sour and super sweet, you don't have to go looking for the flavour like with most lemon meringue pies. Don't limit it to just pie filling either, it can also be used as a decadent spread on bread or scones or be used to sandwich a layer cake together, and it will keep in a jar in the fridge for a week.


Yumm, just yumm!

Monday 24 October 2011

Sugar Cookies - Mom

With my mom visiting, I decided it was time to re-enact a mommy-daughter memory scene, not quite the same without my sisters here, but it had to be done.  Having claimed my inheritance of some fragile and grubby looking cook books, I searched out the recipe for sugar cookies and started making the dough.  My memories of making sugar cookies are primarily of decorating them, I can remember once or twice getting to help cut out the cookies but I can see how this would have been frustrating in the extreme for Mom, so I'm not surprised that we came home to baked cookies and were allowed to 'help' ice them.

Sugar Cookies

Beat together until fluffy:
1/2 cup butter
1/2 cup sugar

Then add in
1 egg yolk
1/2 tsp vanilla

While mixing measure:
1 1/2 cups flour
1 1/2 tsp baking powder
1/4 salt
and sift together

Add the dry ingredients alternately with
3 tbsp milk
Do 3 turns of flour mix and 2 turns of milk, starting and ending with flour.

Once all mixed, wrap it in plastic and chill for at least an hour.

Pre-heat the oven to 375^F (190^C)

Roll out the dough to 1/4 inch thick and cut into shapes, try to get the shapes as close together as possible to get as many cookies from the rolling and transfer the cookies to an ungreased cookie sheet.


Two people cutting out the dough creates a lot of waste, one of us had to stop.
Gather the scraps and re-roll and cut again, then repeat but don't roll the dough more than 3 times - use a knife to cut the last rolling into shapes, or make one big plaque cookie.

Bake for 8 - 10 minutes, unless you have a fan assisted oven or rolled them slightly thinner than 1/4 inch (like me) in which case they could be done in only 5 minutes, they should have a light golden tint around the edges.


Once cool, they can be decorated.  Mom used to make a thick runny icing from just icing sugar and lemon juice with a bit of food colouring which we would smear onto the cookies with a knife then add sprinkles and silver balls.  At times we also got to use the icing squirter with some coloured butter cream icing (butter, icing sugar, and a few drops of water and food colouring, mixed to paste consistency) and pipe shapes to decorate.  Sadly, my cookie decorating skills have not improved much beyond the capabilities of a 7 year old, I think this may be genetic as Mom's skills are no better, but we had fun (when I wasn't snappy) and I now more than understand her frustrations when making sugar cookies.


A fluffy yellow bunny, a high-point in the decorating process (if you haven't seen coloured bunnies, please watch more cartoons).


A not so well dressed boy.


A grizzly bear that more closely resembles a morlock.

Saturday 15 October 2011

Flan Cake with Raspberries - From Mom

When I asked my family to help me with the list of recipes to include, my sister Allana came back with the warning that getting some of these recipes out of Mom was going to be difficult, reckoning that some of the things she baked are carefully guarded secrets. I brushed off that statement, nah my mommy wouldn't do that to me, she's sent me recipes in the past, yes they're full of spelling mistakes but it's easy to figure out, she's just bad at typing, she wouldn't sabotage my project.

Because it's unseasonably warm this autumn and there are still local British raspberries in stores, I thought I'd better make this cake up, otherwise I won't be able to afford it until next summer. I'm now starting to wonder if Allana was right, reading the email Mom sent of this recipe I realise that there are gaping holes in the method instructions, some quite significant like what temperature to set the oven to and how long to bake it! This cake fall into a catagory that I would call 'trophy baking' the kind of thing you make when you want to show off your skills, it's one of the recipes that only Mom baked and usually only on special occasions, and given how little praise she received for her cooking over the years, I might be understanding of why she wants to keep some baking secrets. However, my project is to share these recipes with my sisters so they don't disappear, the instructions below are tainted by my newly formed suspicions, it came out beautifully so whether my mistrust is valid or not I must have done something right.

This was a summer cake that Mom baked when we had company, she used a flan case that resulted in a thin sheet of cake that when turned out onto a plate had a raised fluted edge, she covered the top with raspberries that formed concentric circles to the centre and glazed the fruit so that it shined. The final result was a cake that could have sat in the window of a patisserie shop confident in it's ability to entice you away from chocolate eclairs and towering layered mousse cakes.


Other things missing from Mom's instructions, what did she make the glaze from and did she put some sort of barrier between the fruit and the cake to stop the cake going soggy, because when she upturned the flan she put the fruit next to the more porous side of the cake that baked against the tin, and she's at a school reunion this weekend so I can't even call her up to ask, score: Mom 1, Jenn 0.

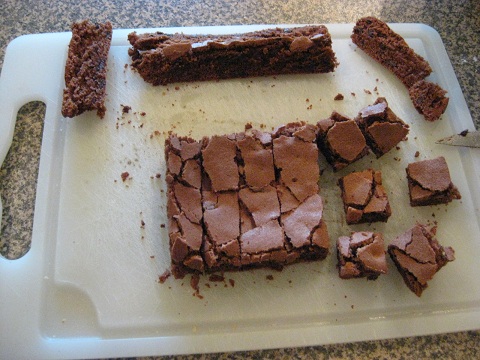
It's a good thing that this recipe is small because my first attempt at batter had to go down the drain.  I might have curdled the eggs because the milk was too hot, or I might have put too much flour in on the first alternating turn, whatever I did it formed little knots that would take crazy beating to get rid of and result in a tough cake. Either way it didn't look anything like the very few times I witnessed the batter when this cake was going into the oven and I thought it best to not even put it in the pan  (somehow Mom managed to avoid an audience when baking this).
On a side note, this recipe must have made its way into Mom's repertoire before we had chickens because she included the comment 'you get a good sponge with only 2 eggs' and frankly once we had chickens rationing egg use in the summer wasn't an issue, rather the opposite. Officially this recipe is either called Lazy Daisy Cake or Hot Milk Sponge, and it is light and soft right out to the edges and delicate, and it really is a cake for grown ups.

Flan Cake with Raspberries
 
Pre-heat the oven to around 350^F or 180^C
 
Grease and flour a (probably) 11 inch round flan tin, or a 9 inch square cake pan (like I did if you don't have a flan tin).
 
In a small sauce pan on a low to medium setting, heat up:
1/2 cup milk
1 tbsp butter
1/2 tsp vanilla (because I don't believe for a second that Mom didn't add this)

do not let the milk scald, it should get hot but you should still be able to briefly stick your finger in it, don't let it form a skin on top or catch on the bottom
 
In a mixer beat until light and fluffy:
2 eggs
1 cup sugar

 
add the sugar slowly, a few spoonfuls at a time, it should take 10 minutes to add in all the sugar then leave it to beat for a few minutes more
 
In a separate bowl, mix together:
1 cup flour
1 1/2 tsp baking powder
 
Add the flour mix and the milk mix in alternating turns, starting and ending with flour, at least 4 turns of flour and 3 of milk. Pour the milk slowly and from a good height in a very thin stream to cool it down. Make sure that everything is mixed before switching between the two.
 
Scrape it all into your cake tin, it should be a very thin liquid-like batter.
 
Bake for around 16 - 18 minutes until a toothpick inserted in the middle comes out clean, it is a thin cake so will be fast to bake. I set the timer for 20 minutes but took it out at 18, and that was a bit too long.
 
 
Once out of the oven, give it a few minutes to settle and come away from the sides then turn it out onto a cooling rack.  I've never had a cake so easily fall out of the pan, I didn't even have to run a knife round the sides.

Once cool, put it on a plate and arrange the raspberries like little mountain ranges on top, then pour over the glaze.  I put the top of the cake up because, like I said, I didn't know if I needed to use a barrier to avoid soaking the cake with the fruit or the glaze.

Glaze

I remember Mom pouring the glaze onto the fruit, and it must have had some sort of agent (possibly cornstarch) to make it cling thickly to the fruit.  I don't have her recipe so I had to find one, it's not the same, if I get hers I'll update.

In a small sauce pan, mix:
1/4 cup sugar
1 tbsp cornstarch (corn flour)

Then stir in until dissolved:
1/4 cup water
2 tbsp lemon juice
Run your finger round the inside of the pan above the water level to make sure you have all the sugar granules mixed in.

Bring it to a boil over medium heat and allow to boil for 1 minute, then set it aside to cool, do not stir once you start to heat it. 

I don't have much experience making glazes but I know that sugar always wants to return to its original state if disturbed while heating (so granulated sugar will go grainy in the finished product if stirred or more sugar is added, syrups will not harden, etc).

Once completely cool, pour the glaze evenly over the fruit - spoon it out if, like me, you don't trust your pouring but can't be bothered to brush it over the fruit.  If you have a flan tin so that your cake will have a little retaining wall to hold the glaze in, double or tripple the glaze recipe, so that you have a full layer of it coating your raspberries, mine just ran over the sides of the cake and under it so I had to stop.

Invite your friends round for a slice, watch them be impressed.


Score: Mom 1, Jenn 1 (I love my mommy, but she has some answers to give on this).

Wednesday 5 October 2011

Stem Ginger Cookies

The previous recipe from Gram LuVerne was the starting point partly because she sent me some recently.  As a thank-you I sent her some of my ginger cookies back, and she asked for my recipe, so begging forgiveness for the almost immediate detour from the purpose of this blog, I figured that I might as well post that here too.  My recipe is for ice-box cookies made with crystallized stem ginger, easy to make and so easy to make look elegant and sophisticated.  I also sent some to my Dad (the recipe makes lots and Mom was acting as the courier, why not right?) and even though he isn't a fan of ginger, he really liked them, although that might have more to do with his perception of the infrequency in which baked goods appear in his life right now, sympathy is hard earned in our family.
Stem Ginger Cookies

Cream together in a mixer:

1 cup butter
1 cup white sugar

When fluffy, mix in:

1 egg

In a separate bowl, mix together:

2 2/3 cups flour
1 1/2 tsp ginger
1/2 tsp baking powder
1/4 tsp salt

When the wet ingredients are looking smooth again, reduce the speed of the mixer and add the dry ingredients, mix just until fully incorporated.

Then stir in:

3/4 cup of crystallized stem ginger (candied ginger)
     that has been chopped into 1 cm cubes

Shape into a brick (or log, or two) and wrap in baking paper and put in the freezer for at least 2 hours (it will keep in the freezer for up to 1 month but put it in a plastic bag if you're storing it for more than a day).

When you're ready to bake, pre-heat the oven to 375^F, or 190^C

Slice the brick into 1/2 cm cookies and place on a baking tray, leave a good amount of space between them, they grow!

Bake for 8 - 12 minutes, it really varies on how cold your freezer is and if you let the dough partially thaw before baking, but they're done when they're golden brown around the edges.

Saturday 1 October 2011

Ginger Snaps - from Gram LuVerne

It seems very appropriate to start an archive with a very traditional classic, since I love ginger and so does my Gram LuVerne, I thought the best one would be her recipe for Ginger Snaps. She got this recipe from her mother-in-law, my great-grandma Emilie Pierce, in 1941. There are no eggs in this recipe so the dough works a bit like shortbread, but dark molasses and quite a bit of ginger pack a great flavour punch and the aroma in my kitchen as they bake is heavenly. Gram sent me some of these a few weeks ago whem my mom came to visit, the flavour was rich and spicy, perfect for dunking in a cup of tea.

Pre-heat the oven to 350^F (176^C)

Combine in a mixer:

1 cup butter (or 1 cup margerine & 1 tbsp oil)

¾ cup white sugar

¾ cup dark molasses

Once fully mixed, add in:

1 tsp baking soda dissolved in 3tbsp boiling water

Sift together, then mix into the wet ingredients:

4 cups flour – 4 ½ to make a stiff dough for a cookie with a good snap!

2 tbsp of powdered ginger1 tsp each of cloves and cinnamon (but these are optional, Gram usually doesn’t use them and neither did I)

Roll the dough into round balls and press flat with the base of a cup dipped in sugar, Gram uses the bottom a small glass pitcher dipped sugar to make a pretty star design, I don’t own anything so fancy so used the bottom of a jam jar as it was the best I could find for some decorative effect that didn’t have a brand logo, country of origin mark or a recycle symbol. The dough can also be rolled out and cut into shapes for a very thin cookie or just dropped by the spoonful.

Bake for 8 – 10 minutes


Then make a cup of tea and enjoy.

Sunday 25 September 2011

To begin with

Baking might be described as culinary science, but every home baker knows that recipes evolve over time, even new recipes that I have found on my own have morphed after very few repetitions. Whenever I ask my mom for one of her recipes, she will find her original recipe, type it out, email it to me and I end up with a finished product that doesn't resemble anything like the cake/loaf/pie that I remembered her making. Upon asking where I went wrong, she will confess to a multitude of slight changes, a bit more spice or less fat, a substitution for something that we didn’t normally buy or a specific ingredient that was only ever bought for that recipe, many of these are things I would not have thought up on my own. Like any living archive, the knowledge only exists if it gets shared, and I know that my sisters would like to benefit from this information too.

So the search is on, I have instructed my mom, gram and sisters to start making their lists of everything they want to see on here.  What do they remember baking and eating so I can start creating our archive of recipes, I have demanded access to original cook books and recipe cards, there will be interrogations on ingredients and techniques, and the stories that made them part of our history will be recorded alongside the recipe.  Thankfully, they have gamely agreed to help me, hopefully I won't make the process difficult.